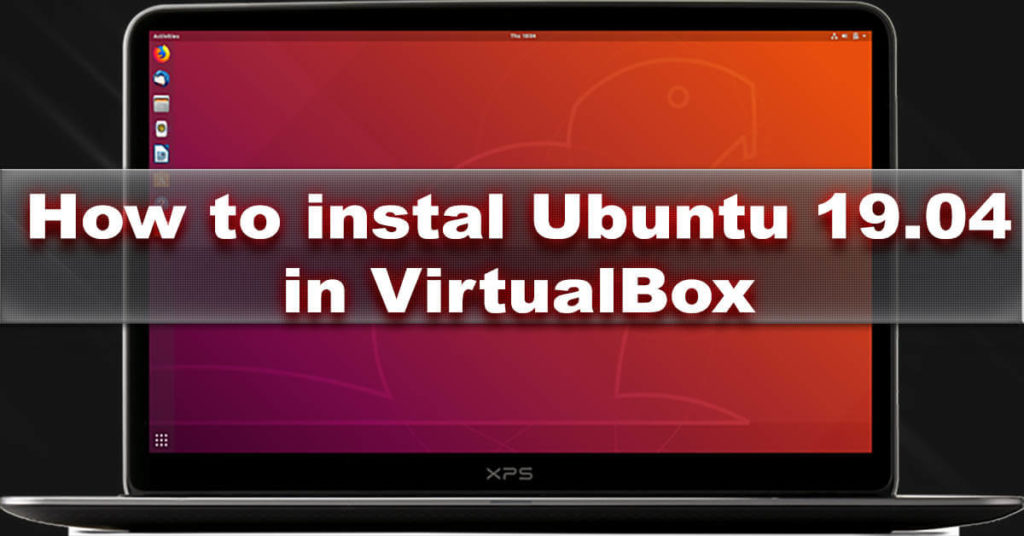
Follow this tutorial to install ubuntu in virtualbox but why you would do that?, In many cases, it is more convenient to configure a virtual machine and install the necessary programs on it than to do it on a real computer.
First, when installing on a “clean” virtual machine, there is a greater chance that everything will pass without errors, since There will be no conflicts with already installed programs.
Secondly, the virtual system can be easily “rolled back” to the previous state if something went wrong. Thirdly, all virtual machine data is stored as files on your computer, so it is easy to copy it somewhere else and, for example, take it with you on a business trip to work on any real computer in a familiar virtual environment. Fourthly, virtually any operating system (OS) can be installed on a virtual machine, including one that does not coincide with the system installed on your computer.
The operating system on your real computer will be called the host system , and the one installed on the virtual machine will be called guest or virtual .
Installing Oracle VirtualBox for Microsoft Windows
First, install a special program that will allow us to create virtual machines.Oracle VirtualBox
In any browser, open the official website virtualbox.org . Let’s follow the link Download sand download two files to your computer:
- VirtualBox 6.0.6 platform packages
- VirtualBox 6.0.6 Oracle VM VirtualBox Extension Pack
(the numbers indicate the version number and may be different).
Video tutorial : how to install Ubuntu 19 in Virtualbox
Run the first one. All settings leave the default. We will answer yes to all questions. During the installation, the network will be unavailable for some time (so do not start the installation if you have, for example, some file being downloaded at this time).
Upon completion of the installation, you must run the second file for execution and also answer all questions in the affirmative.
Creating a new virtual machine in Oracle VirtualBox
Open the Oracle VirtualBox virtual machine manager:
Start ‣ Programs ‣ Oracle VM VirtualBox ‣ Oracle VM VirtualBox .
Create a new virtual machine: Machine ‣ Create (or press a key combination Ctrl+N).
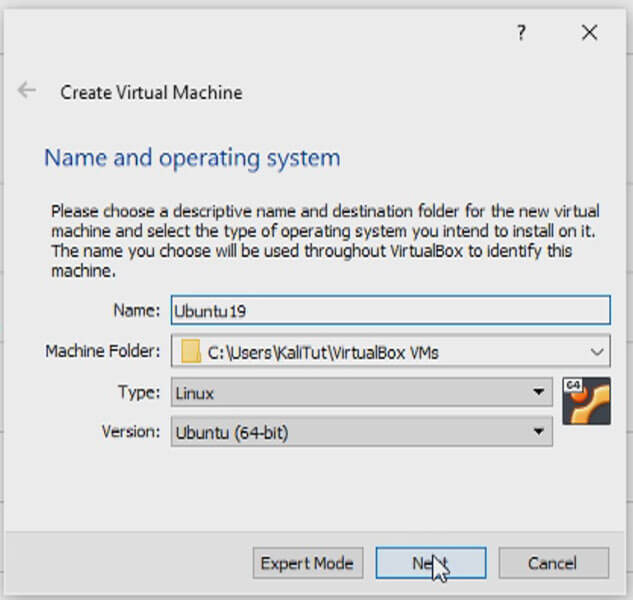
Name: Ubuntu-01. Type: Linux. Version: . Click the Next button (fig. 1).Ubuntu (32 bit / 64 bit)
Fig. 1. Creating a new virtual machine in the Oracle VirtualBox manager
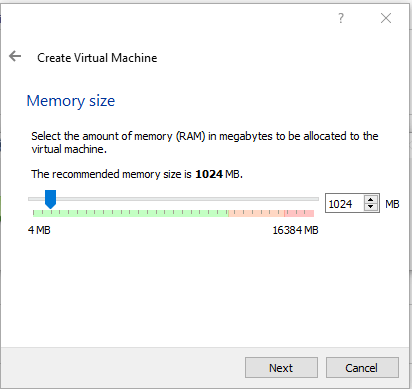
We indicate the memory size of 1024 MB (it’s important here that there is enough memory left for the main system; therefore, if the amount of RAM in your computer is less than 2 GB, then change the input value so that it is slightly less than half of the total memory).
Click the Next button (fig. 2).
Fig. 2. Setting the amount of RAM virtual machine
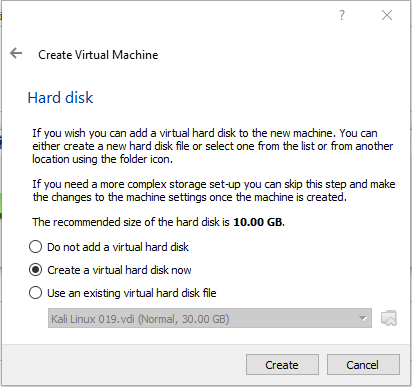
In the Select a hard disk window, select the Create a new virtual hard disk option . Click the Create button (Figure 3).
Fig. 3. Selecting a virtual hard disk
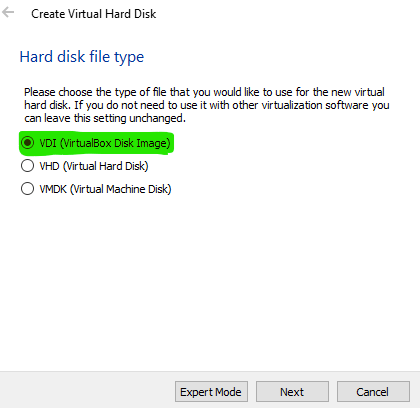
Specify the type of the new virtual hard disk: . Click the Next button
(fig. 4).VDI (VirtualBox Disk Image)
Fig. 4. Select the type of virtual hard disk
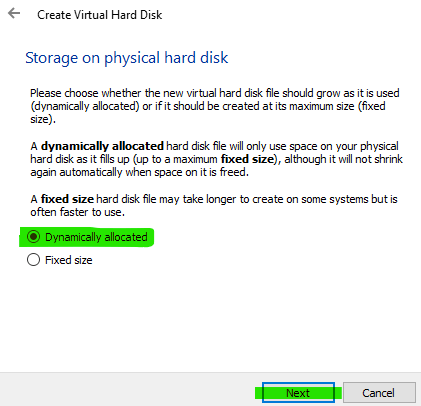
We indicate the storage format: click next button the Next (Next)
(Figure 5.) Dynamic virtual hard disk
Fig. 5. Selecting the storage format of the virtual hard disk file
This will mean that the file that stores all the information of the virtual machine will initially have the smallest possible size, and then will grow in size as the filling of a virtual disk.
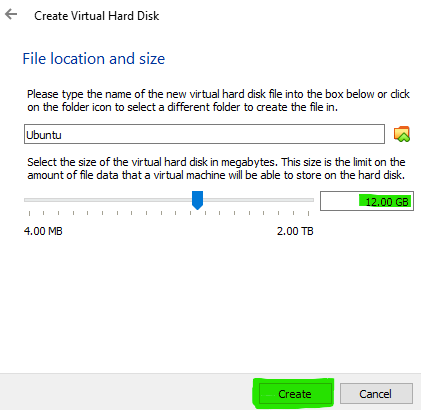
Specify a name Ubuntu-01and maximum size of the virtual hard Wild: . Click next to the button Create (Create)
(Fig. 6). 12 GB
Fig. 6. Setting the name and size of the virtual hard disk
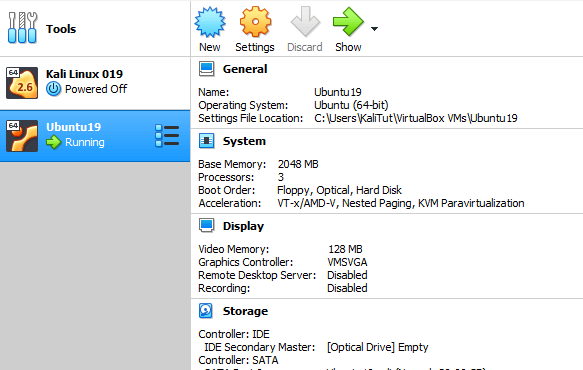
The virtual machine is created, its name appeared in the list of available virtual machines in the VirtualBox Manager window, the Oracle (Fig. 7).
Fig. 7. Provide a name and the virtual hard disk size
Select the newly created virtual machine by clicking the left mouse button and click the Configure button . In the dialog box that appears on the left, select Display and select the Enable 3D acceleration checkbox on the Video tab . You can also slightly increase the amount of video memory.
If desired, you can also increase the number of processors available to the virtual machine ( System section , Processor tab ), but first you have to check the Enable I / O APIC checkbox on the Motherboard tab .
In the same settings dialog box on the left, we’ll go to the Shared Folders section and on the right, click the small button with the plus sign to add a shared folder with which you can copy files from the host system to the virtual machine and back. In the dialog that opens, choose a folder that will be common to both systems (you can create a separate folder for this purpose, for example, with a name Public), the next field automatically displays the name for the shared folder that the virtual machine will use. Check the Auto-connect checkbox and press the OK button twice .
Downloading the Ubuntu installation disk image
Open in any browser Web-page http://www.ubuntu.com/download/desktop/ . choose the 32-bit if you have 32-bit CPU
Installing Ubuntu on a virtual machine
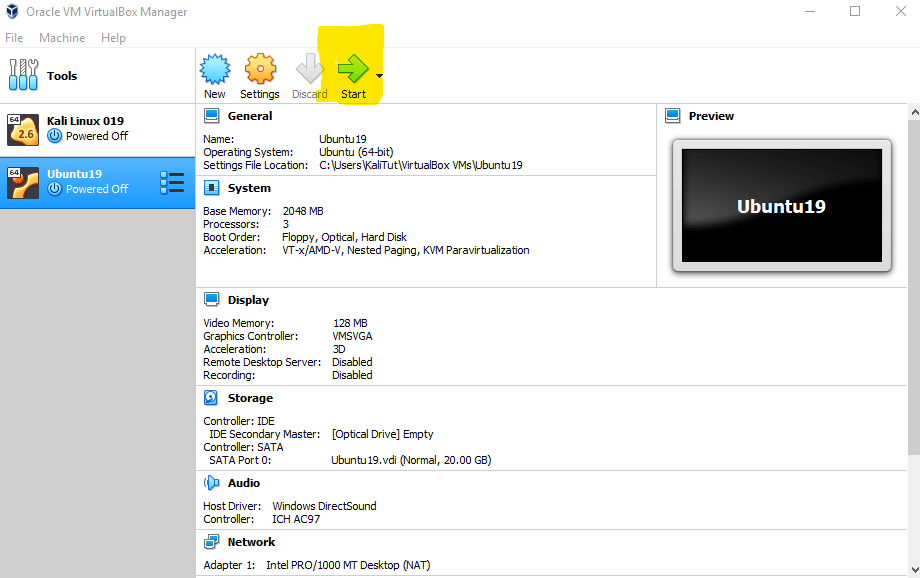
In the Oracle VirtualBox Manager window, left-click on the name of our virtual machine and click the Run button (Figure 9).
Fig. 9. Run the virtual machine
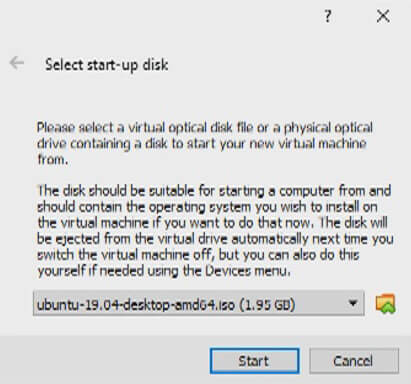
We will be prompted to choose the image of the installation disk. Click next to the small button on the bottom right and select the ISO file obtained in the previous section (Fig. 10). Click the Continue button .
Fig. 10. Selecting an installation disk image when you first start the virtual machine.
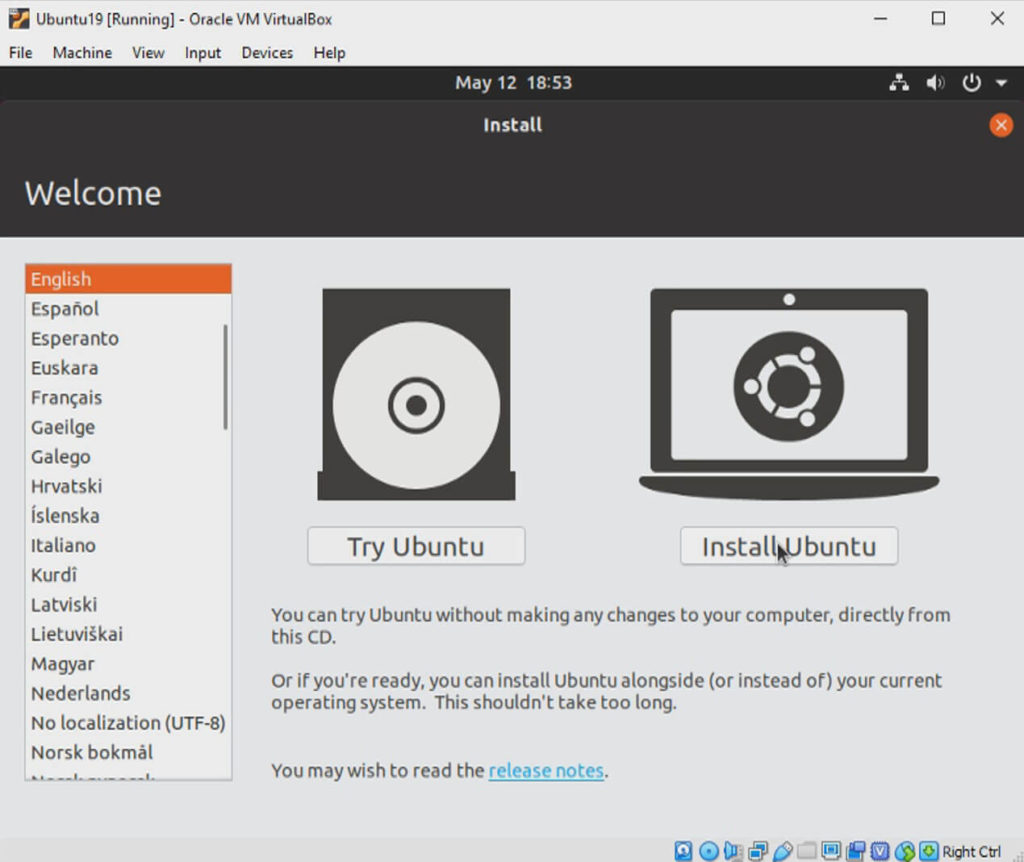
After a short pause, an image of the desktop of the virtual machine will appear on the screen
Fig. 11. In the list on the left with the mouse you will need to select a language ( English for me) and click the Install Ubuntu button .
Fig. 11. Choose your language and start installing Ubuntu
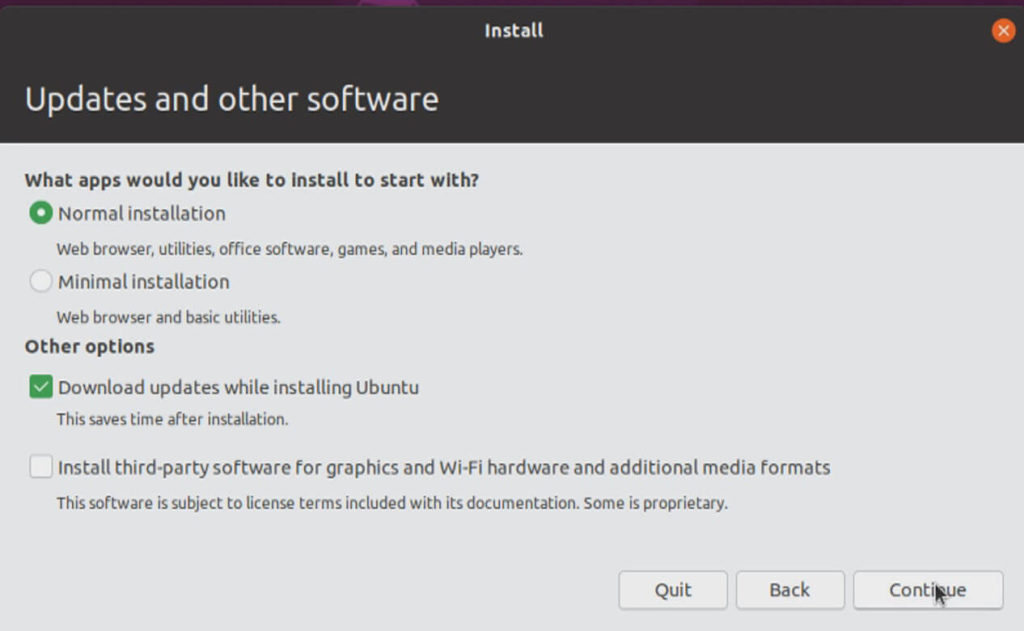
if you have a high speed internet Put two checkboxes Download updates when installing and Install this third-party software (Fig. 12). Click the Continue button .
Fig. 12. Continuing the installation of Ubuntu
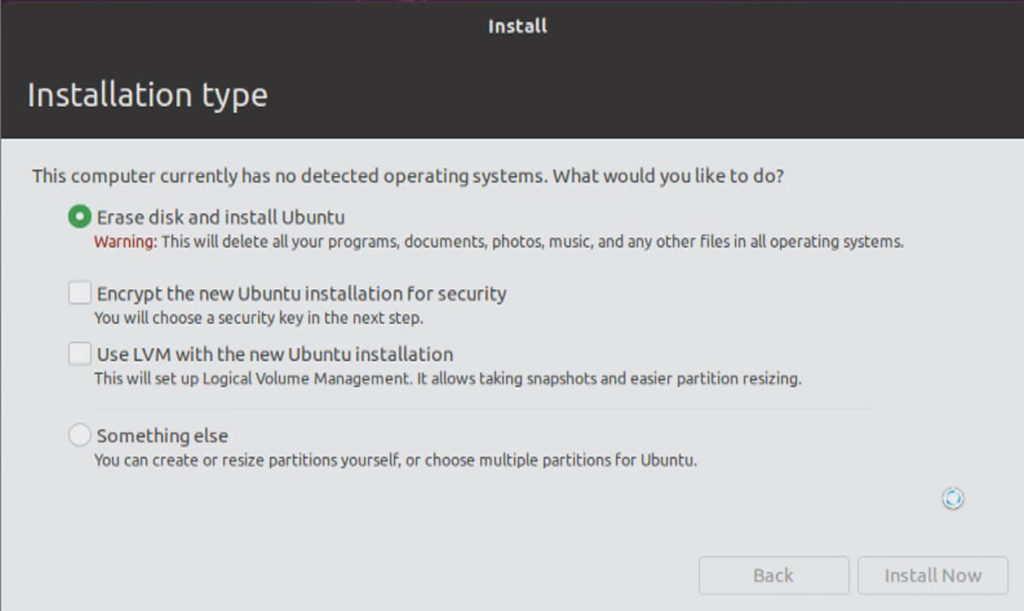
Select the mode (Fig. 13). We are not afraid that all the information stored on the hard disk will be lost, because in fact it is a virtual hard disk just created by us. Click the Install Now button .Erase disk and install Ubuntu
Fig. 13. Selection of installation type
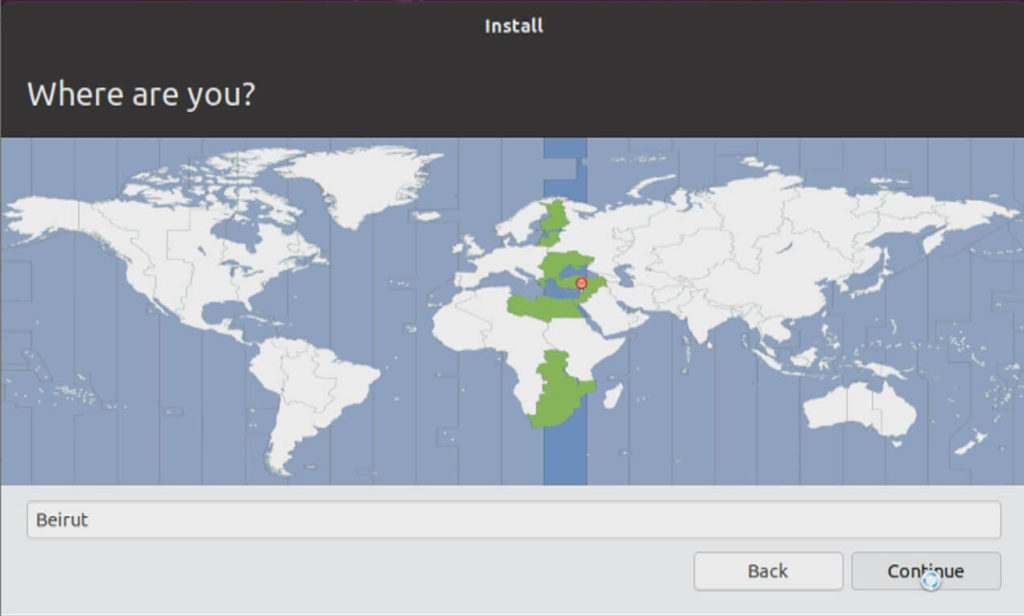
Click the left mouse button to select your time zone and city (its name can also be entered from the keyboard, a list for selection will appear), and then click the Continue button (Fig. 14).
Fig. 14. Select time zone
Select the keyboard layout press the Continue button again .
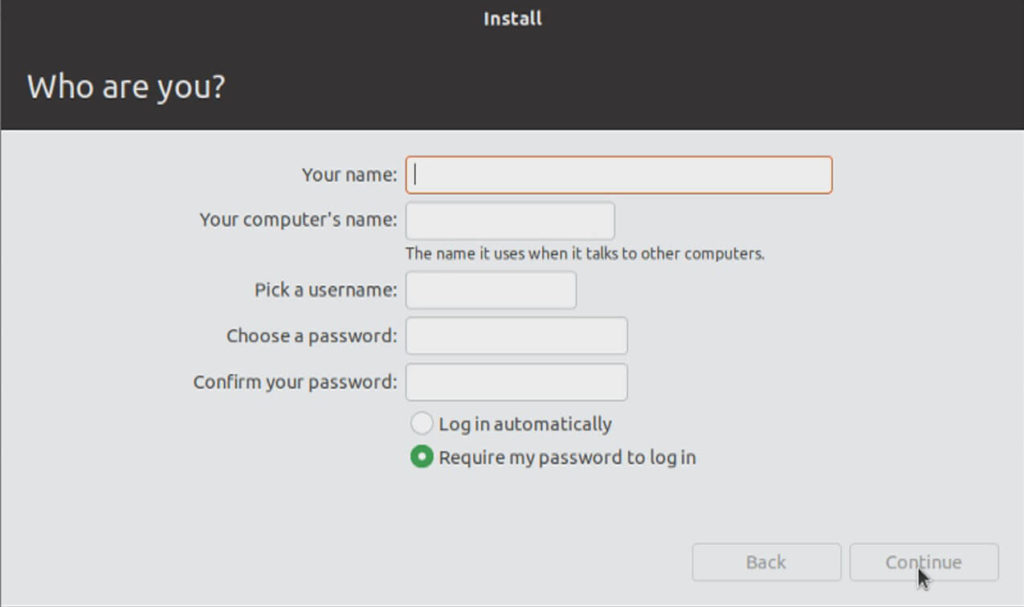
Enter the name User1, the computer comp1name, the username, user1and two times the password (Figure 16). It is desirable that the password includes uppercase and lowercase letters of the Latin alphabet, numbers and special characters, such as a period, comma or asterisk. Do not forget to write down the password. Click the Continue button (fig. 16).
Fig. 16. Set username and password
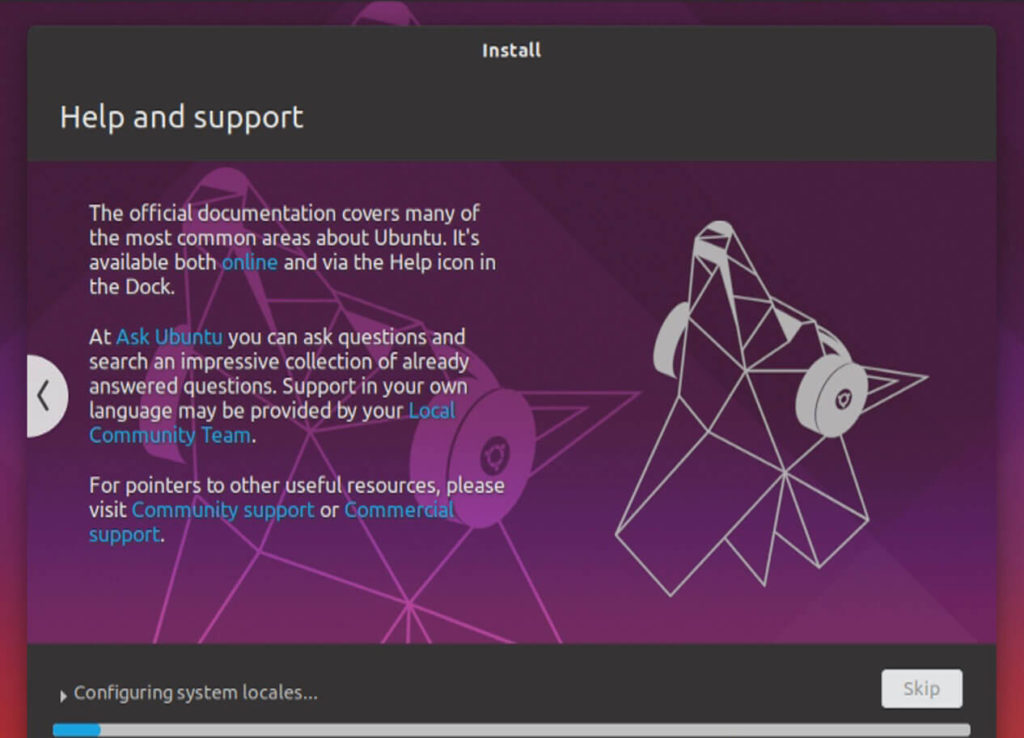
The installation process will begin (Fig. 17).
Fig. 17. Ubuntu installation process
When the installation is completed, click the Reboot button
If the advice to remove the installation disk appears on the screen, in the virtual machine window, perform the menu item Devices ‣ Optical drives ‣ Remove the disk from the drive , then click the console screen of the virtual machine and press the key Enter.
After the reboot, enter the password for the user User1and press the key Enter
and thats it .

Leave a Reply