
What is ifconfig command?
The ifconfig command has been used for a very long time to configure the network in Linux operating systems. With it, you can enable or disable network interfaces, configure their settings, switch modes, and more. Then the IP utility was developed that contains more functions and has a completely different syntax.

But many users are used to using ifconfig, especially since its syntax is simpler.
ifconfig command not found
With the advent of the ip utility, ifconfig has been removed from many distributions. But for the most part it still comes by default. if ifconfig command is not found you can get it back by installing it.
install ifconfig linux command line
Installing ifconfig in Ubutnu is done with the command: Now type popd to return to the previous directory:
sudo apt install net-tools
In Arch Linux:
sudo pacman -S net-tools
ifconfig syntax
The ifconfig syntax is very simple when calling without parameters, it will return a list of network interfaces connected to the system and their characteristics, such as ip address, gateway address, packet size, frequency for wireless networks and other parameters. If you specify the interface and the necessary commands, you can change various interface settings. Here is the syntax itself:
$ ifconfig options interface command parameters address
An interface is a network interface about which you want to view information or change its parameters. All this can be done with the help of commands. Let’s look at the main ones:
- up – enable interface;
- down – turn off the interface;
- (-) arp – enable or disable the use of the ARP protocol for the interface;
- (-) promisc – enable or disable promiscuous mode for the interface;
- (-) allmulti — enable or disable multicast mode;
- metric – change metric parameter;
- mtu – change the maximum packet size;
- netmask – set network mask;
- add – add an ip address for the interface;
- del – remove the ip address of the interface;
- media – set the type of external protocol;
- [-] broadcast – set the broadcast address or disable this feature;
- hw – set the MAC address for the interface;
- txqueuelen – the size of the interface queue;
Parameters and address are optional and depend on the command used. And the options affect the behavior of the utility more globally. There are only a few options, consider them:
- -a – apply the command to all interfaces, for example, useful if you want to disable or enable all network interfaces;
- -s – display a short list of interfaces.
Please note that to use the utility, you will need superuser rights. And now let’s look at a few examples.
ifconfig example
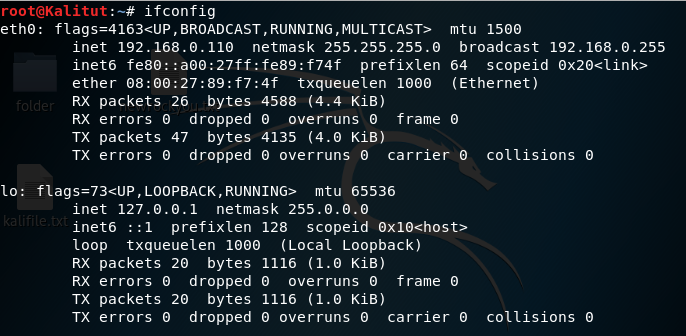
First, let’s review the list of interfaces that are connected to your system and are currently activated. To do this, simply run the command without parameters:
sudo ifconfig
You can display only information about a specific interface, for example, about eth0:
sudo ifconfig eth0
To view a list of interfaces with minimal information about them, use the -s option:
sudo ifconfig -s

With the -a option you can display all interfaces, even those that are currently disabled:
ifconfig -a
To enable an interface, use the ifconfig eth0 up command:
sudo ifconfig eth0 up
To disable – down :
sudo ifconfig eth0 down
You can get more detailed error information with the -v option :
sudo ifconfig -v
Enable ARP protocol support for the interface:
sudo ifconfig eth0 arp
Disable ARP support:
sudo ifconfig eth0 -arp
Enable promiscuous mode in which the interface accepts all packets passing through it:
sudo ifconfig eth0 promisc
And to disable:
sudo ifconfig eth0 -promisc
With the netmask command you can set the network mask for the interface:
sudo ifconfig eth0 netmask 255.255.255.0
To add an ip address for an interface, just use it after the interface:
sudo ifconfig eth0 192.168.1.11
The broadcast command allows you to set a broadcast address:
sudo ifconfig eth0 broadcast 192.168.1.255
With the help of the hw command you can set the hardware address or the so-called MAC address. Here, in addition to the address itself, you need to specify the type of network. This is ether for wired Ethernet, ax25 (AMPR AX.25), ARCnet and netrom (AMPR NET / ROM). For example:
sudo ifconfig eth0 hw ether BC:AE:C5:BE:8B:B7
With mtu you can change the maximum packet size:
sudo ifconfig eth0 mtu 1000
These were all major examples. Unlike ip, the ifconfig command does not contain all the necessary capabilities to fully configure the network and therefore you still have to use utilities such as route or arp.
In fact, setting up the network ifconfig will be done in several commands. Let’s say we will configure the interface eth0:
sudo ifconfig eth0 up
sudo ifconfig eth0 add 192.168.1.10
sudo ifconfig eth0 netmask 255.255.255.0
sudo ifconfig eth0 broadcast 192.168.1.255
sudo route add default gw 192.168.1.1
Here we use the ip address for the computer 192.168.1.10, the network mask 255.255.255.0 and the gateway for access to the network 192.168.1.1. After these settings, it remains to specify the DNS server and the Internet should work.
Conclusion
In this article, we looked at how the ifconfig command works and what we can configure with its help. I, as before, recommend using the ip utility, as it is newer, and is used by default in most distributions. But Linux is a free system and you can use the tools you like.
Leave a Reply