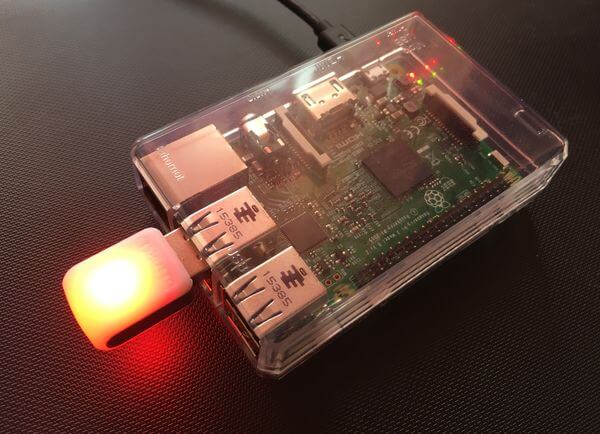
USB Flashing Led

The blink (1) is great for showing a status or condition. For example, a service status is interesting. So, whether service or service started or not started. Or to put it another way, whether he is running or not.
What is the blink (1)?
blink (1) by ThingM is a USB stick with a RGB LED that can be controlled by software. In this case, blink (1) can accept any RGB color and flash, flash or just permanently light up. This is interesting for any kind of status display, without electronics or other hardware tinkering.
Raspberry Pi and USB LED flashing (1): show service status
requirements
For this example to work, it is assumed that blink (1) and blink1-tool are fully installed and set up.
Functions in detail
First, we need to clarify what information we need and how we get it. We also define how flashing (1) should be controlled. As an example, we test the functions on the SSH server. Of course, any other service or daemon can be tested.
We would like to query the service status. In principle, we want to know if a service is up or running. So we need a command to answer a simple question with yes or no.
The service status of the SSH server is obtained via the following command:
systemctl status ssh
That is too detailed for us. We need a simpler information.
systemctl is-active ssh
The result can be “active”, “inactive” or “unknown”. Interesting for us is the status “active”. If this is the case, then blink (1) will be solid green.
blink1-tool - green -q
If the status is “inactive”, then blink (1) will light solid red.
blink1-tool --red -q
If the status should be different, e.g. B. “unknown”, then we let flashing (1) permanently yellow.
blink1-tool --yellow -q
And so we have defined all functions and just have to pour them into a script.
Script: Query service status and activate USB-LED flashing (1)
We first create a script file. Here we choose the home directory of the user “pi” as storage location. We choose this because none of the functions need root privileges.
nano /home/pi/checkservice.sh
Then copy the following lines into the still empty file:
#! / Bin / bash

test = $ (/bin/systemctl is-active ssh)

if ["$ test" == "active"]; then
  #echo -e "active"
  /usr/local/bin/blink1-tool - green -q
elif ["$ test" == "inactive"]; then
  #echo -e "inactive"
  /usr/local/bin/blink1-tool --red -q
else
  #echo -e "unknown"
  /usr/local/bin/blink1-tool --yellow -q
fi
Save, close, execute and then test the file.
chmod + x /home/pi/checkservice.sh

/home/pi/checkservice.sh
If the script works, you can then create a cron job for regular execution.
Create cronjob
Then we create a cron job in the user crontab.
crontab -e
Here we enter the following line:
* / 5 * * * * /home/pi/checkservice.sh> /dev/null 2> & 1
The file “checkservice.sh” is executed every 5 minutes. Any script issues will be redirected to Nirvana. So there is no feedback anywhere. That’s why we assume that the script works.
Save the file, close, wait and drink tea. After a few minutes the flashing (1) should light up red or green. Depending on whether the selected service is running or not. In a rather unlikely event, the blink (1) would turn amber.
Troubleshooting
What if something does not work? There are two sticking points. Once it affects the script and the other is the cronjob. Make sure you have not made a typo.
Make sure that the programs “systemctl” and “blink1-tool” are in the absolute paths. You can check this with “which systemctl” and “which blink1-tool”. If necessary, adjust the paths in the script.
Raspberry Pi and USB LED blink (1): show user login status
requirements
For this example to work, it is assumed that blink (1) and blink1-tool are fully installed and set up.
Functions in detail
First, we need to clarify what information we need and how we get it.
In principle, we want to know is a user is logged in or not. For this we need a command with which we can answer a simple question with yes or no.
Whether a user is logged in can be checked with the following commands:
w
who -a
users
Most likely, the command “users” in question. It’s a string with all logged in usernames.
It is interesting for us if the user is logged in. If this is the case, then blink (1) will be solid green.
blink1-tool - green -q
If the user is not logged in, then blink (1) will be solid red.
blink1-tool --red -q
Script: Interrogate logged-in users and activate USB-LED flashing (1)
We first create a script file. Here we choose the home directory of the user “pi” as storage location. We choose this because none of the functions need root privileges.
nano /home/pi/checkuser.sh
Then copy the following lines into the still empty file:
#! / Bin / bash

userlist = $ (/usr/bin/users)

for u in $ userlist; do
  if ["$ u" == "pi"]; then
    #echo -e "login"
    /usr/local/bin/blink1-tool - green -q
    exit 0
  fi
done


#echo -e "logout"
/usr/local/bin/blink1-tool --red -q
Save, close, execute and then test the file.


chmod + x /home/pi/checkuser.sh
/home/pi/checkuser.sh
If the script works, you can then create a cron job for regular execution.
Create cronjob
Then we create a cron job in the user crontab.
crontab -e
Here we enter the following line:
* / 5 * * * * /home/pi/checkuser.sh> /dev/null 2> & 1
The file “checkuser.sh” is executed every 5 minutes. Any script issues will be redirected to Nirvana. So there is no feedback anywhere. That’s why we assume that the script works.
Save the file, close, wait and this time drink coffee not tea ;). After a few minutes the flashing (1) should light up red. After the user “pi” has been logged in, the flashing (1) should light up green after a few minutes.

Leave a Reply