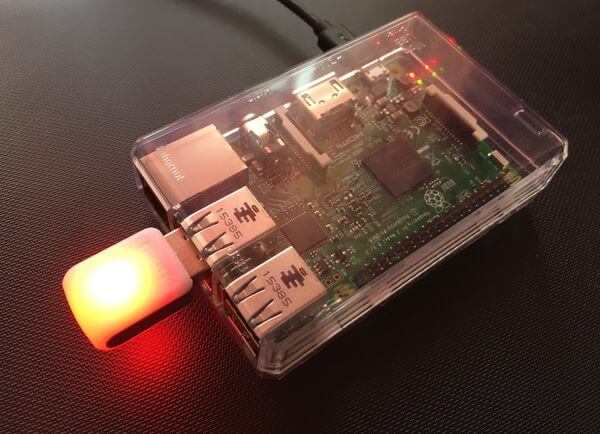
USB LED flashing (1) Unlike other hardware components, the blink (1) is not plug-and-play hardware, such as a wireless adapter, USB keyboard, or USB stick. The blink (1) has a specific function to set up or program. True, the blink (1) of Raspbian Jessie is detected on Raspberry Pi. However, it is only possible to control the blink (1) with additional software. The is to be installed later.

blink (1) by ThingM is a USB stick with a RGB LED that can be controlled by software. In this case, blink (1) can accept any RGB color and flash, flash or just permanently light up. This is interesting for any kind of status display, without electronics or other hardware tinkering.
A first stop should be the official documentation on Github. Because here you get the software or source code to compile.
However, the documentation is very confusing and contains gaps. This makes the installation and commissioning on Raspberry Pi very cumbersome. Therefore, at this point an alternative to the official guide.
Step-by-step instructions for the blink (1) on Raspberry Pi
- Plug in and check hardware detection
- Installation of the control software
- Make control software available system-wide (optional)
- Set permission for normal users (optional)
After these four steps, blink (1) with its control software is fully integrated into the system and can be used without any restrictions.
Step 0: Think of the end in the beginning
To begin with, there are a few things to keep in mind. So before you start and threaten to fail in the end.
At a USB voltage of 5.16 to 4.78 volts, the power consumption varies from 0.001 to 0.05 amps.
When plugged in during operation, a Raspberry Pi (1) B crashed reproducibly and restarted. For PC and notebooks, this problem did not occur. This indicates a known problem with the power supply. It is assumed that the blink (1) draws a lot of power when plugging in and forces the usual power adapters used for Raspberry Pi to its knees. However, there was a crash with a Raspberry Pi 2 B and 3 B with the same power supply.
A stable operation can be seen as confirmed with a Raspberry Pi 2 B and 3 B. Other models have not been tested.
Step 1: Plug in and check hardware detection
First, insert the blink (1) into a free USB port. The blink (1) USB stick is usually detected automatically. Whether the hardware has been recognized by the system is to be checked.
lsusb
If the hardware detection is successful, the blink (1) with the ID “27b8: 01ed” will log in as “ThingM blink (1)”.
It may be that the description text is empty. The hardware was detected anyway. All you have to do is update the list of USB IDs (Vendor ID: Device ID).
sudo update-usbids
2nd step: installation of the control software
To control the blink (1) you need a control software. The so-called “blink1-tool”. You can directly download, unpack and run this for different operating systems and also Raspbian. However, this approach is NOT recommended because it may be an outdated version.
wget http://thingm.com/blink1/downloads/blink1-tool-raspi.zip

unzip blink1-tool-raspi.zip
sudo ./blink1-tool --list
It is recommended to download the current source code from Github and to compile it yourself.
The installation and compilation of the control software and all other installation steps should be done as root. That makes less problems.
sudo -i
First of all, some packages have to be installed afterwards in order to be able to successfully compile the software from Github.
apt-get update
apt-get install git build-essential pkg-config libusb-1.0.0
Then download the source code from Github and then compile the software.
git clone https://github.com/todbot/blink1.git
cd blink1/commandline
make
In any case, some messages will now scroll across the screen. But they do not have to be error messages. As a rule everything should work. If not, packages are usually missing for compilation.
After successful compilation you can test the tool.
./blink1-tool --list
If a blink (1) stick was detected, then one should be displayed here. If several of these sticks are plugged in, then they are distinguished by their ID.
In principle, you can now work with the blink (1). Not very comfortable, though. It is recommended that the further installation steps also be processed.
Step 3: make control software available system-wide
Currently you have to be in the current path or specify the complete path of the blink1-tool command. If you want to do it system-wide, then you have to move it.
cp blink1-tool/usr/local/bin
Is /usr/local/bin
which blink1-tool
If the file is in this directory, you can call it from any directory.
cd /
blink1-tool
Step 4: Set permission for normal users
Now you can run the control software but only as a user “root” or as a normal user with the command line suffix “sudo”. If you want to allow the execution as a normal user, then you have to add a UDEV rule.
To do this, open a new UDEV rules file:
nano /etc/udev/rules.d/51-blink1.rules
Here are the following lines:
SUBSYSTEM == "input", GROUP = "input", MODE = "0666"
SUBSYSTEM == "usb", ATTRS {idVendor} == "27b8", ATTRS {idProduct} == "01ed", MODE: = "666", GROUP = "plugdev"
Then save the file, close it and reload the UDEV rules.
udevadm control --reload-rules
Disconnect the blink (1) and plug it in again. Then leave the user “root” and run the control software as a normal user.
exit
blink1-tool --list

Leave a Reply