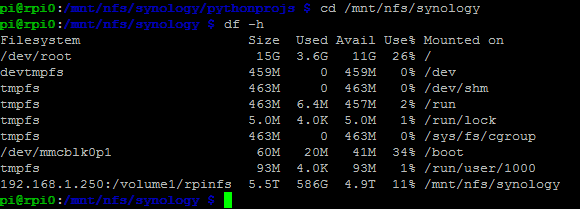
raspberry pi mount nfs/unmount NFS share, In principle, an NFS export (Network File System) always consists of two sides. The server side and the client side. We configured the NFS server. Now it’s about setting up or mounting the exported directory in the local file system of a client or another server.

NFS is mounted independently of the user. When I log in to the client as Hugo, files are also created on the NFS mount with the Hugo user ID of the client machine. If Hugo does not exist on the server, the file still gets the ID (a simple integer number), which corresponds to the ID of Hugo on the client machine.
Preparations
Before you can mount an NFS share, it must exist on a server on the network. If not, you must first set up an NFS share.
Set up NFS server on Raspberry Pi
raspberry pi nfs mount task
Solution: Configure NFS client
For this,we have to install a few packages on the client or server. Because NFS is widely distributed among Linux distributions, it can be natural that the NFS packages are already installed.
sudo apt-get update
sudo apt-get install nfs-common
Next, we need to create a local directory on the client that later serves as a mount point to mount the remote directory.
sudo mkdir -p /home/nfs/public
Before we attach a directory, we check if it has ever been exported from the NFS server. For this we need the IPv4 address of the NFS server. In this example, the NFS server has the IPv4 address “192.168.1.2”.
showmount -e 192.168.1.2
If the directory “/ home / public” is displayed there, then we can mount it manually on the client.
sudo mount -t nfs -o soft 192.168.1.2:/home/public/home/nfs/public
The default value of the parameter “-o” is “hard”. As a result, a program accessing an NFS directory will stop responding if the NFS server becomes unavailable. So that does not happen, we choose “soft”.
If the command went through without error, we test the release or the export.
To do this, we create a file on the NFS server and see if it exists.
touch /home/public/test
ls /home/public
If so, we test the share on the client and delete the file.
ls /home/nfs/public
rm /home/nfs/public/test
If the file is then gone on the server, then everything worked as intended.
Automatically mount/unmount an NFS directory with “autofs”
The goal is to make an NFS-exported directory permanently available on a client. Normally this would be done by modifying the file “/ etc / fstab” so that the NFS directory is automatically included at system startup. However, “fstab” has the disadvantage that mounting fails if no network is available at system startup. Usually, you create a script that hangs the directory only when a network connection was detected. Or you can enter the mount command in the file “/etc/rc.local”.
But we want a solution that really works while avoiding error-prone pull-ups. The establishment of NFS often fails because it does not permanently get the shares on the clients. Therefore we integrate the exported directory with the tool “autofs”.
With “autofs” partitions can be mounted automatically when needed and automatically unmount after a long period of non-use.
Note: autofs uses automount. In addition, the exported directory is always mounted on first access and not automatically at system startup. This is not a problem if you accept that there will be a short delay in first access.
Solution: Permanently mount NFS directory on a client
First, we need to install “autofs” on the client:
sudo apt-get install autofs
Then we create a map file:
sudo nano /etc/auto.nfs
There we enter the exported directory:
public -fstype = nfs, rw, retry = 0 192.168.1.2:/home/public
Then save and close the file.
Then we open the master file in which the map files are entered.
sudo nano /etc/auto.master
At the end of the file we add the following line:
/home/nfs/etc/auto.nfs
Then save and close the file.
Then the modified map file must be reloaded by a restart of “autofs”. It will be taken into consideration for future integration.
sudo service autofs restart
Now you can test if the exported directory is included.
mount
View of the directory:
ls /home/nfs/public
Here, the contents of the exported directory should be displayed by the NFS server. Make sure you have at least one file in it to see on the client if the mount worked. If the directory on the server is empty, you can not tell the difference between mounted and not mounted on the client.
Whether “autofs” really works, you can only check by restarting the client.
sudo reboot
As a rule, the shared directory should be available after the first access.
ls /home/nfs/public
Troubleshooting: NFS client
If the integration of the exported directories does not work, check whether NFS shares are available at all.
showmount -e 192.168.1.2
If so, then there may be a problem with “autofs”. To do this, check the syslog file, which may contain error messages about “automount”.
sudo cat /var/log/ syslog | grep -i automount

Leave a Reply