How to install kali linux: This section will detail the process of installing Kali Linux in VirtualBox virtual machine. The installation process on a real computer is very similar to the described here.
What is Kali Linux
Kali Linux is used for penetration testing and forensic examinations. As a professional penetration tester or forensic expert, you must be absolutely sure about the integrity of your tools. If your tools are not credible, then the results of your research are also not credible.
Even if your standards are not so high, it is still highly recommended to adhere to the actions described here, since non-genuine versions of the software can intentionally or unintentionally cause serious harm.
how to download kali linux
Download Kali Linux (as well as any other programs) only from official sites. For Kali Linux, the official sites are
- https://www.kali.org/downloads
- https://www.offensive-security.com/kali-linux-vmware-arm-image-download/
These sites cannot be accessed without using SSL, which makes it difficult for a man-in-the-middle attack, which reduces the danger of getting something that you don’t download.
Which kali linux should i download?
The Kali distribution can be downloaded from the official website . The developers have released several versions, including the classic lightweight, assemblies with different graphical shells, bit depths, etc.
If you are going to install Kali Linux in a virtual machine, then pay attention to the finished images:
However, there may be fairly outdated versions, so I prefer to download the usual ISO.
ISO images can be used as Live-systems, as well as install from them. These images can be downloaded at: https://www.kali.org/downloads/
Kali Linux Weekly Images
These images are available at: http://cdimage.kali.org/kali-images/kali-weekly/
And a list of checksums for them at: https://archive.kali.org/kali-images/kali-weekly/SHA1SUMS
64-bit, 32-bit, light-images, images for ARM architectures, images with various desktop environments are distinguished from the weekly and “regular” ISO images.
If you have a 32-bit computer or VirtualBox only supports 32-bit virtualization, then select “ Kali Linux 32 bit ” for download .
If you have a 64-bit system, you can choose from several that differ in the desktop environment. If you have no preferences in choosing the desktop environment, then just select “ Kali Linux 64 bit ”.
The ISO file can be downloaded either through a direct link or through a torrent. It is recommended to choose torrent downloads.
When everything you need is downloaded, you can start installing kali linux virtualbox.
Kali Linux virtualbox
Each operating system in VirtualBox is a separate virtual machine. It has its own unique settings and parameters designed for stable and correct operation of the distribution.
Creating a virtual machine
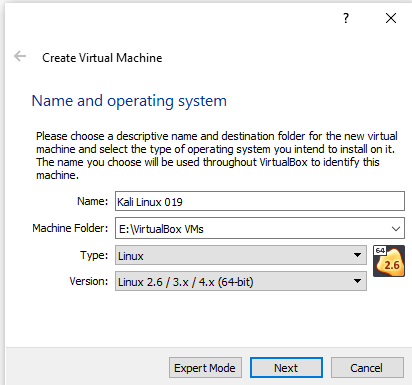
In VM Manager, click on the “Create” button .
In the Name field, start typing Kali Linux. The program will recognize the distribution kit and will fill in the “Type” and “Version” fields on its own.
Please note that if you downloaded a 32-bit OS, then the “Version” field will have to be changed, since VirtualBox itself sets the 64-bit version.
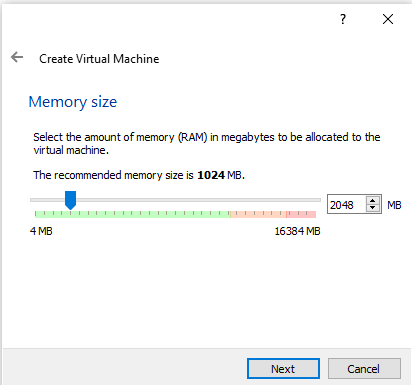
Enter the amount of RAM that you are willing to allocate for Kali to run.
Despite the recommendation of the program to use 512 MB, this volume will be very small, and as a result, there may be problems with the performance and launch of the software. We advise you to allocate 2-4 GB to ensure the stable operation of the OS.
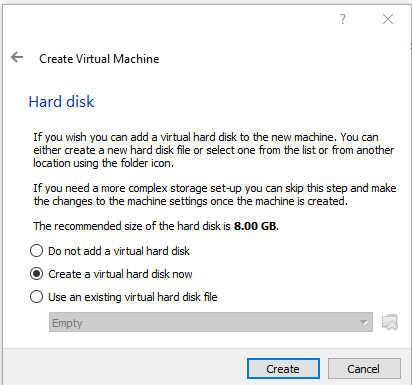
In the window for choosing a virtual hard disk, leave the setting unchanged and click on “Create” .
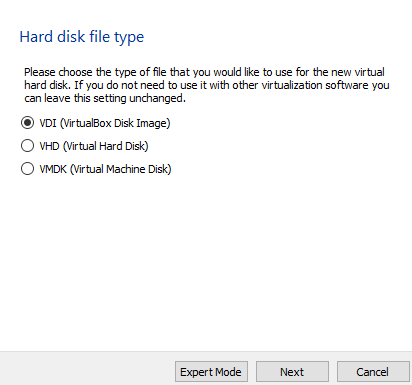
VB will ask you to specify the type of virtual storage that will be created for Kali to run. If in the future the disk will not be used in other virtualization programs, for example, in VMware, then this setting does not need to be changed either.
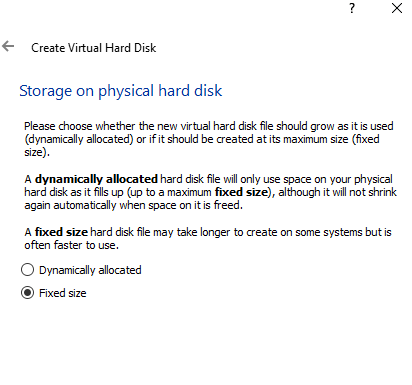
This is where the choice is yours. A dynamic virtual hard disk takes up exactly as much space as is actually occupied in a virtual machine. A fixed hard drive will immediately occupy the entire size allocated for it, although it is mentioned in the certificate that it is better in performance. I always choose a Fixed disk for myself:
If you choose the dynamic format, then up to the selected size the virtual drive will grow gradually as it fills up. The fixed format will immediately reserve the specified number of gigabytes on the physical HDD.
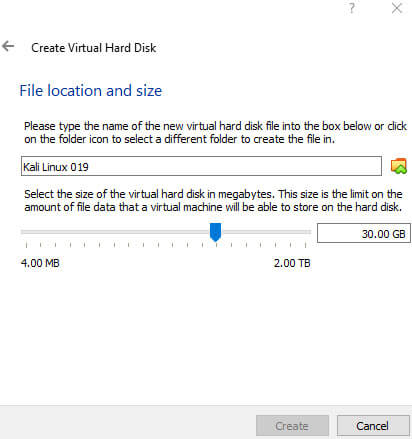
The disk size should not be less than 20 gigabytes, otherwise, almost immediately after installation, you will receive messages that there is not enough space.
I choose 30 gigabytes for myself, but this does not mean that it will be that much that is occupied on a real hard disk, since I also choose a dynamic virtual disk, i.e. it “stretches” only as needed. If you install a small hard disk and the virtual machine runs out of space, then you have a big problem.
Also select the location of the virtual disk – place it on a partition with enough space:
Enter the name of the virtual hard disk and also specify its maximum size.
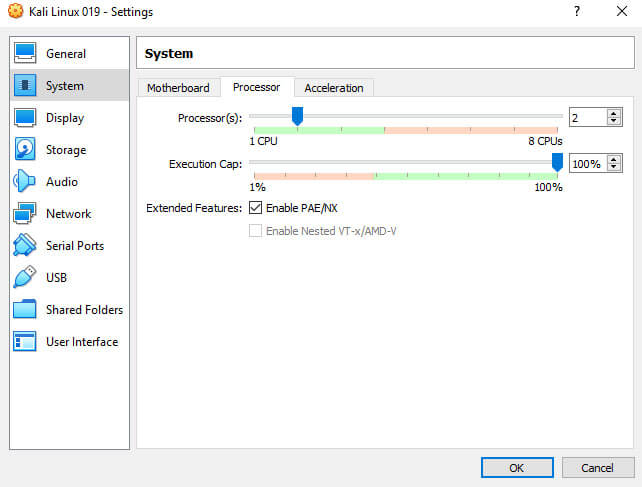
The machine is created, but before starting, I prefer to make a few more settings. In the settings, I go to the tab “System” -> “Processor” and add another core, and also tick the “ Enable PAE/NX ”:
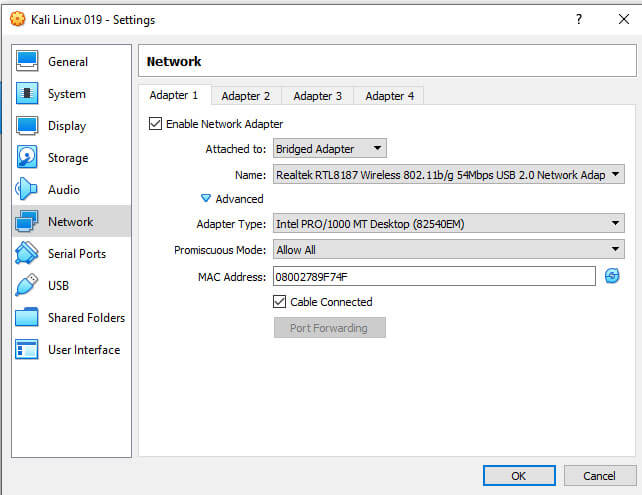
Next, go to the network settings and ” Connection Type ” change to ” Network Bridge “, also in the ” Advanced “, where “ indiscriminate mode ” select ” Allow all “.
install kali linux on virtualbox
Now that everything is ready to install the OS, you can start the virtual machine.
In VM Manager, select Kali Linux with a left mouse click and click on the “Run” button .
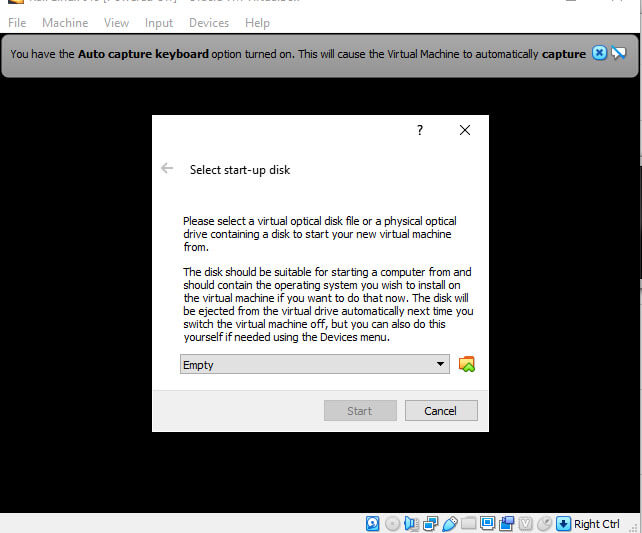
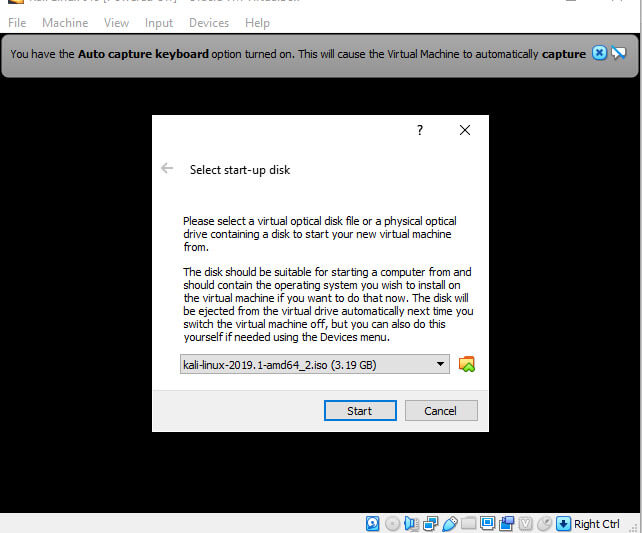
The program will ask you to specify a boot disk. Click on the folder button and select the location where the downloaded Kali Linux image.
Click ” Start “:
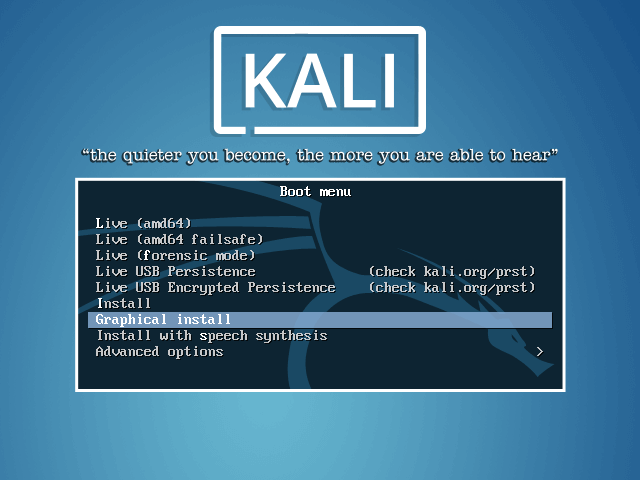
After selecting the image, you will be taken to the Kali boot menu. Select the type of installation: the main option without additional settings and subtleties is “Graphical Install” .
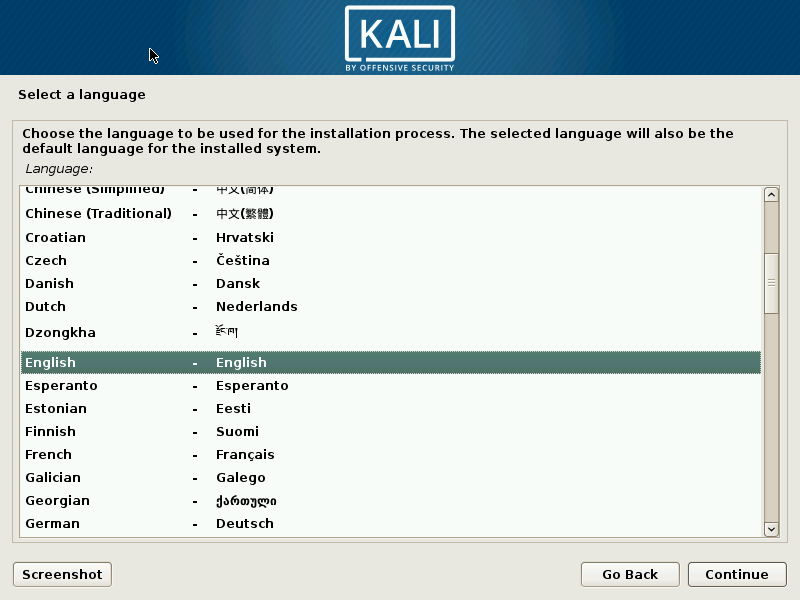
Select the language that will be used for installation in the future in the operating system itself.
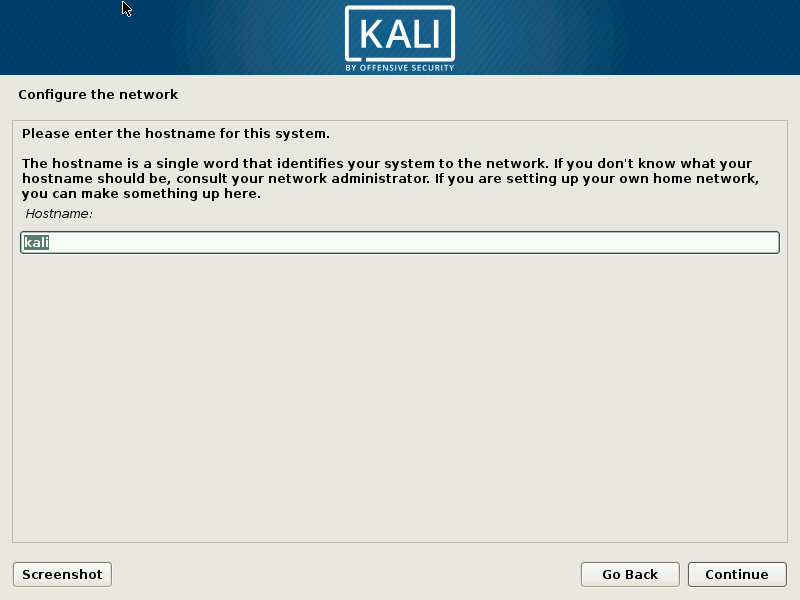
choose the computer name:
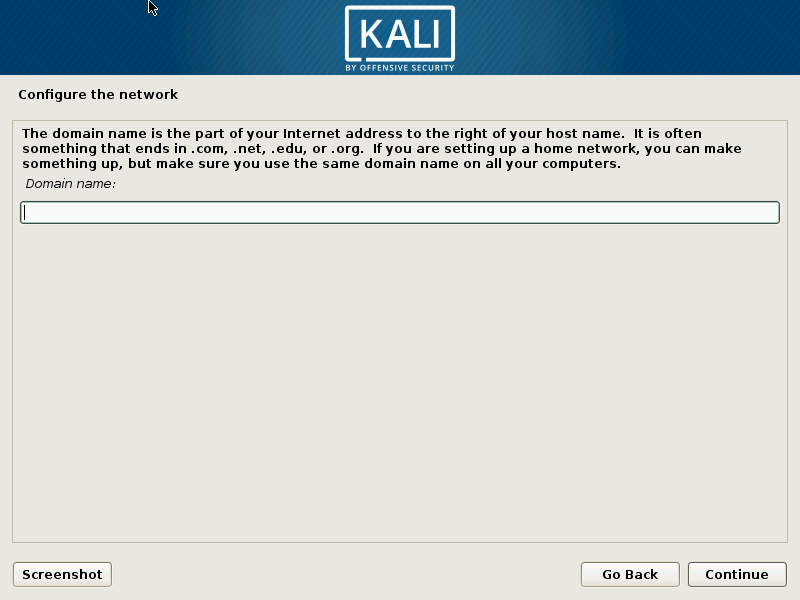
Domain name can be omitted:
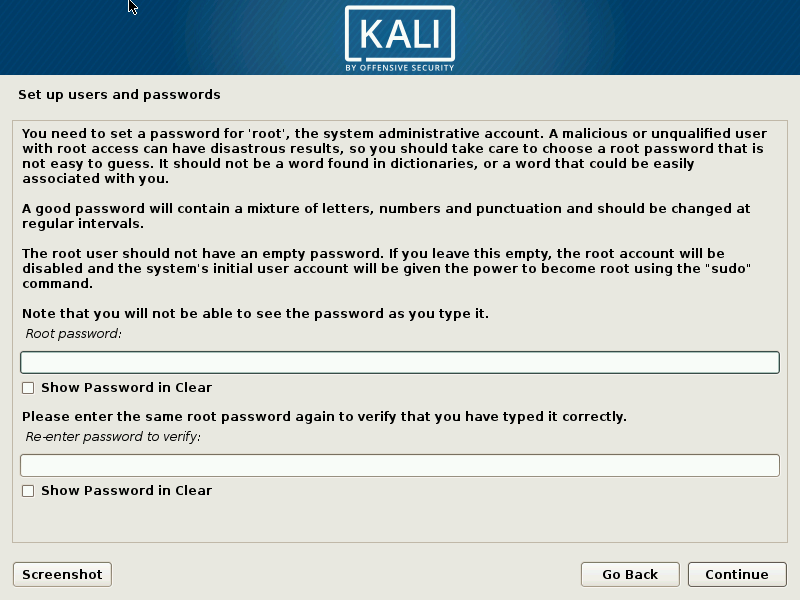
Think up, remember and enter the superuser password:
The installer will prompt you to create a superuser account. It has access to all files of the operating system, so it can be used both to fine-tune it and to completely destroy it.
The second option is usually used by cybercriminals or it can be the result of rash and inexperienced actions of the PC owner himself.
In the future, the credentials of the root account will be needed, for example, when working with the console, to install various software, updates and other files with the sudo command, as well as to log into the system – by default, all actions in Kali occur through root.
Create a secure password and enter it in both fields.
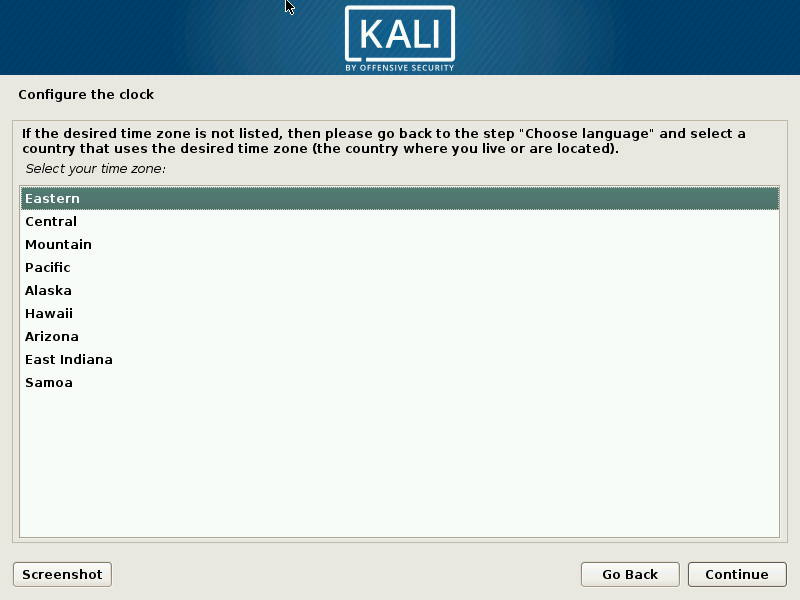
Choose your time zone. There are few options, so if your city is not in the list, you will have to specify the one that matches the value.
If you are in a virtual machine, do not change anything. If you are installing on a real computer, be very careful here – I cannot give more selective recommendations on a real computer, because all have different configurations:
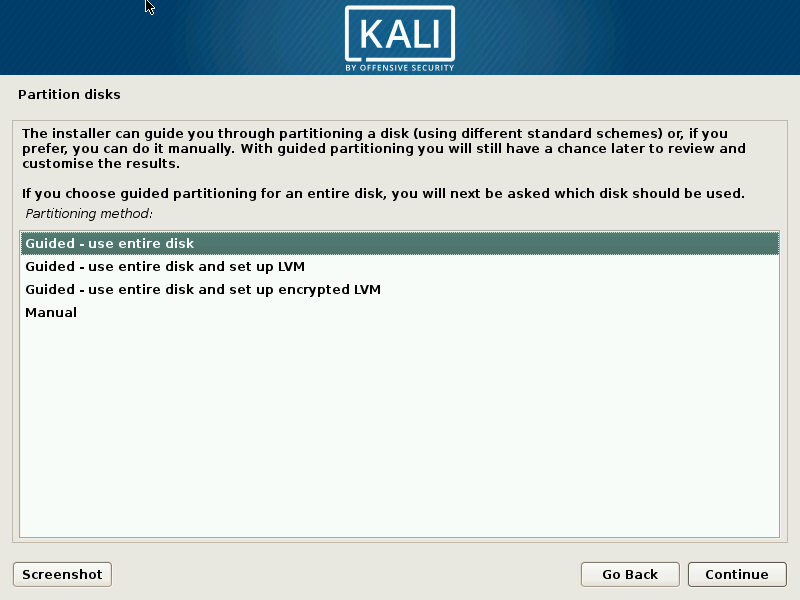
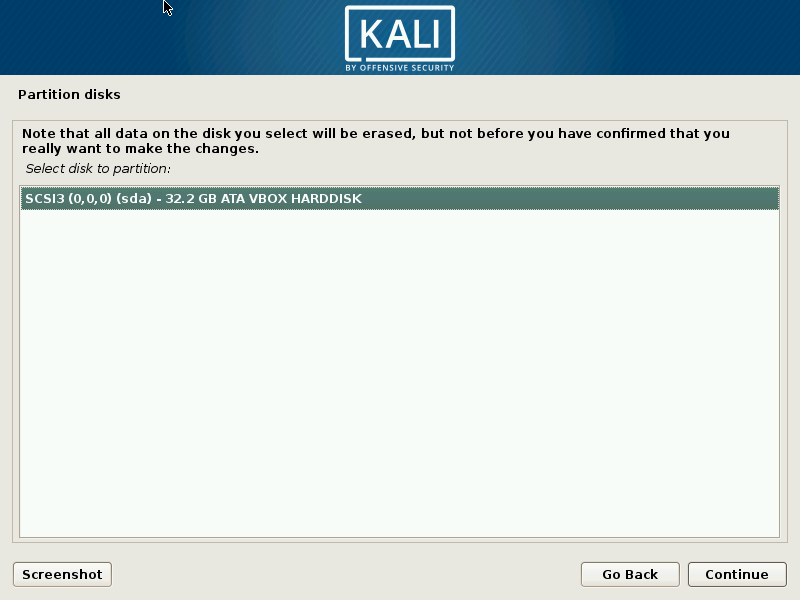
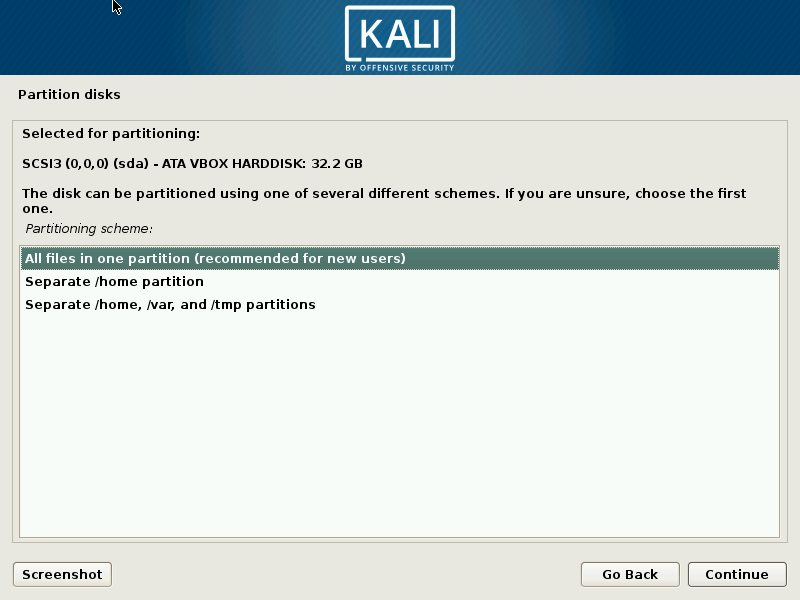
Click “Continue”:
Click “Continue”:
Click “Continue”:
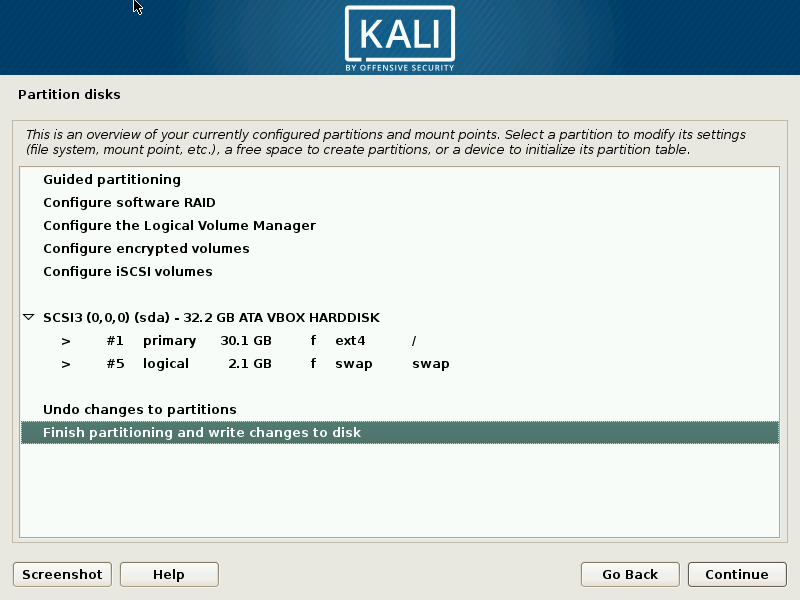
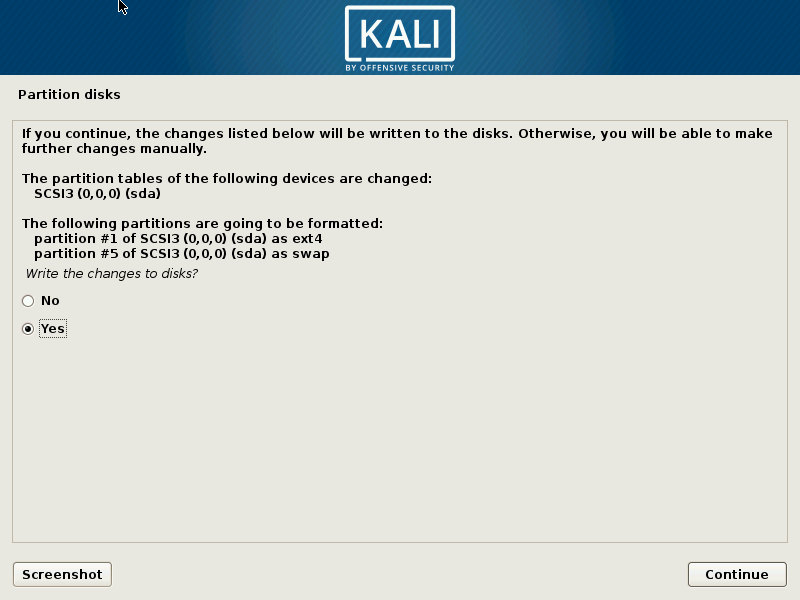
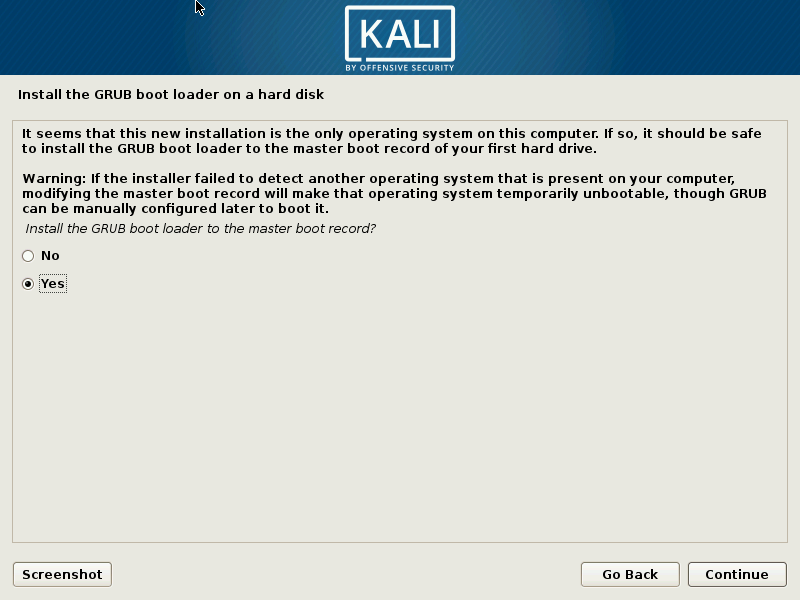
Change “No” to “Yes”:
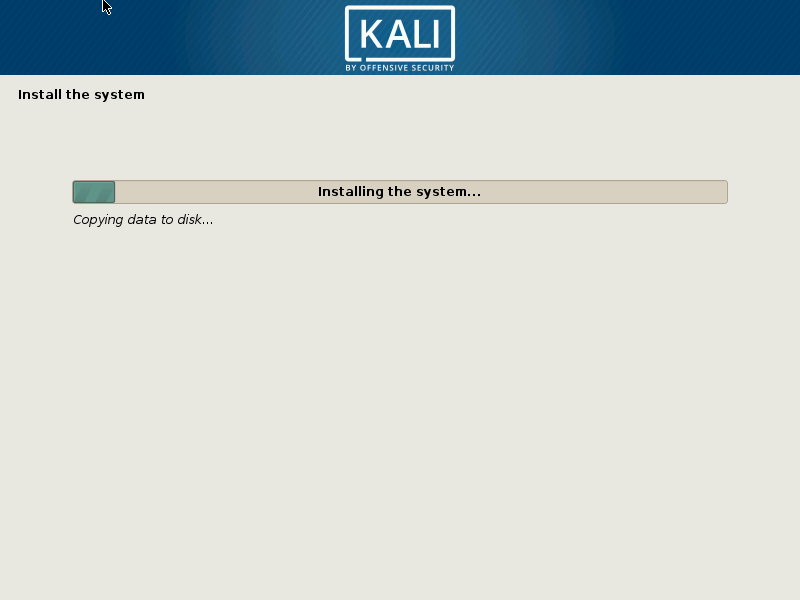
We are waiting for the completion of the process:
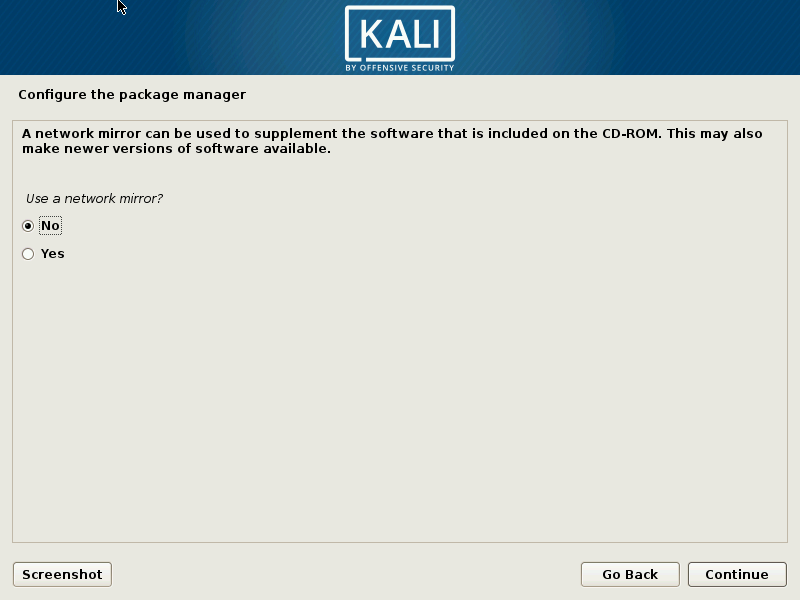
Click “Continue”: ( To save time i chose no )
Yes and click Continue
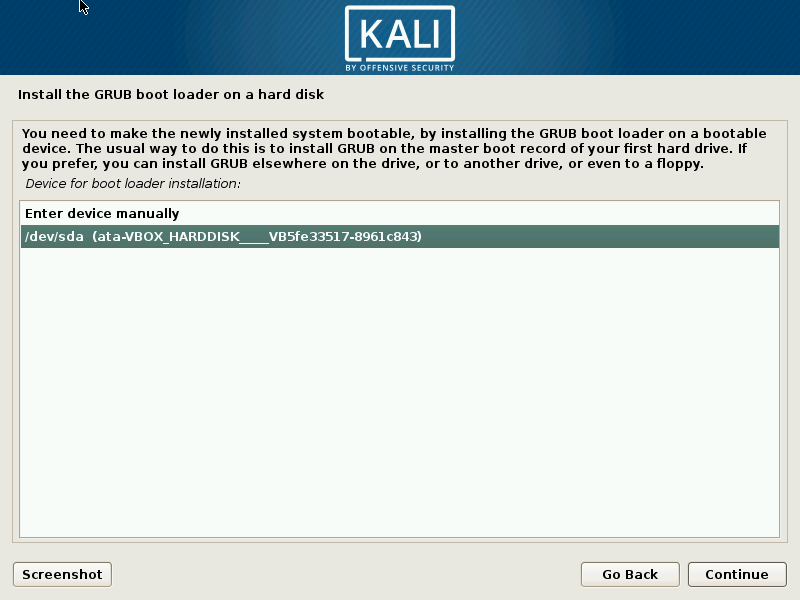
Select an available device:
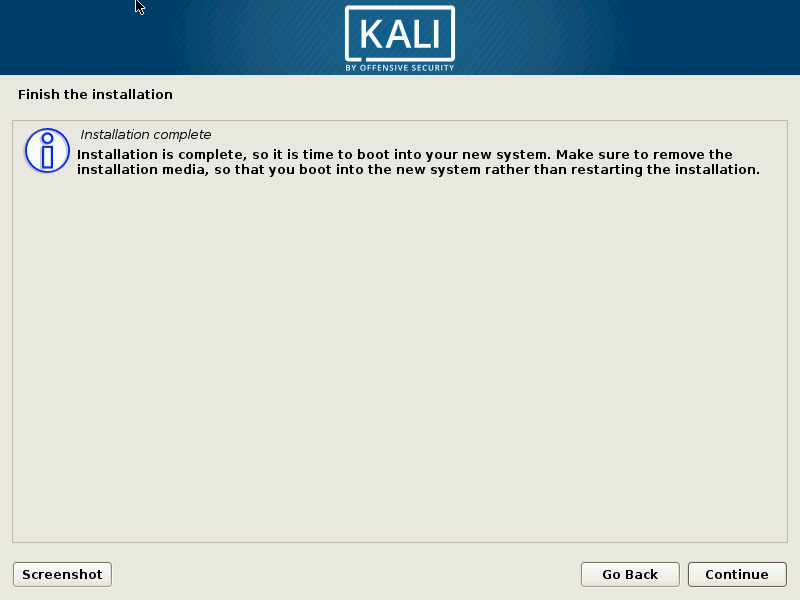
All is ready:
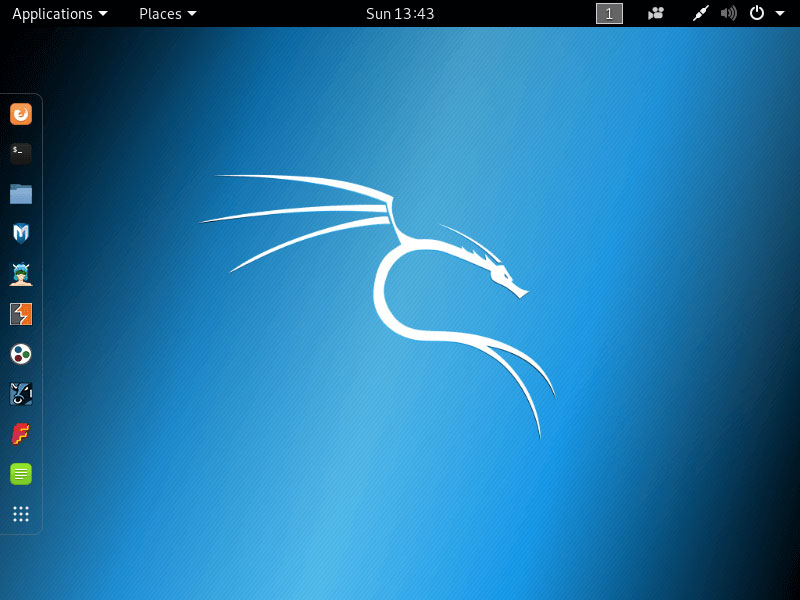
Reboot.In theory, the installation disk should be removed automatically. If this does not happen, the installation disk is removed in the VirtualBox menu: Devices -> Optical disks -> Remove disk from the drive . The ISO file
good reads

My computer says that the file is not supported.
after following that above procedure, the system grants me “username” and “password” which i didn’t set during installation.
Can you help me please?
i have tried uninstalled it and installed it for several times but no change.
username: “kali” and password: “kali”